
My blog is one month old, sweet little thing. ;) As part of my miniseries about scrolled lists I wanted to write a post about a handy editor script that allows us to extend the UI context menu by our newly created component. The script is tiny and trivial, but I also wanted to point out the sole possibility of extending the editor to those of you, that didn’t come across this topic earlier.
The editor script
So, we’ve written a nice component – Scrolled List. We also created the associated prefab. Now, every time, when we want to add this list to our view, we have to look up this prefab in the project files. Ok, we have the search field, but it’s still one more step on the road the the perfect game.
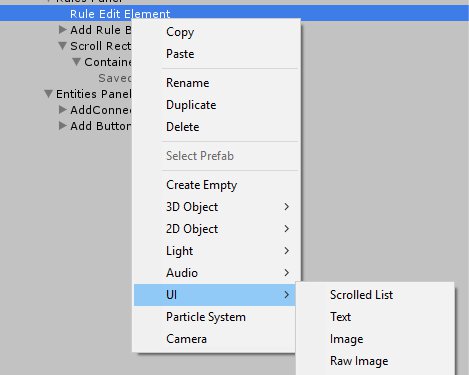
When we click on a game object on our scene, we have a context menu with a UI option. This contains Unity’s GUI components, such as slider/image/button/etc. It would be nice having there our scrolled list too, wouldn’t it?
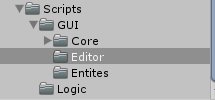
I guess most of you already are aware of the fact that you can extend the Editor’s functionality by writing custom editor’s scripts. It can be a new option in the menu (not only this context menu, but also the main menu at the top), some fancy panel in the Inspector or some custom indicators and lines drawn on the Scene View. You can find plenty of tutorials on this matter in the Internet, along with a nice course on Pluralsight. Today I just wanted to show you my little script for the list, so the only thing you have to know is that all of the scripts that modify editor’s functionality have to be located in the “Editor” folder (you have to create one).
In this newly created directory I created the MenuExtensions script. It holds a class with the same name that has only two private static methods for now. The menu item marked methods have to be static, so the other has to be static too. The first method is called Instantiate. It instantiates given game object as a child of currently selected object. It also breaks the prefab instance.
private static void Instantiate(GameObject elem)
{
    var instantiatedObject = GameObject.Instantiate<GameObject> (elem);
    instantiatedObject.transform.SetParent (Selection.activeTransform);
    PrefabUtility.DisconnectPrefabInstance (instantiatedObject);
}
Now the only thing left to do is to create a menu item click handler:
private const string ScrolledListPrefabLoc = "Assets/Prefabs/GUI/ScrollView.prefab";

[MenuItem("GameObject/UI/Scrolled List")]
private static void ScrolledListOption()
{
    Instantiate(AssetDatabase.LoadAssetAtPath<GameObject>(ScrolledListPrefabLoc));
}
In the MenuItem attribute we provide the path at which our new option should appear. “GameObject” indicates that we choose the context menu shown after clicking the game object.
And voila - now we can add a new scrolled list component with only one click:
This is pretty straightforward – in my humble opinion it is worth to write such tiny editor for further convenience. If you would like to discover other viable options of extending the menus, you can start by reading for example this tutorial.
This post is part of a series about scrolled lists:
• ScrolledList – the basic implementation
• Editor script that adds this component to the context menu (this one)
• Scrolled List Dynamic - final version
• Object pooling and Scrolled List Pooled
As always - like my fan page or follow me on Twitter to get notified when future posts appear. :)
comments powered by Disqus