Hi! Today I’m gonna show you how to setup your first project in Unity using Entitas Framework. Entitas Framework is an implementation of the ECS pattern - Entity Component System. I really like creating projects using this architecture, as it is pretty clean and allows for a nice separation of data and logic. I also find it a pleasure to maintain. Since we started using this pattern at work, I no longer tend to hate the project after half a year - I really think it’s harder to write spaghetti code this way. There are also other pros of using it - optimization plays a big role here, as similar object are located closely in memory, which makes iterating over them faster. Also, Entitas’ components are really tiny and lightweight - that is a huge advantage over using many MonoBehaviours. It’s worth noting, that Unity is preparing it’s own implementation of ECS, together with a new Job System, but at the time of writing this post it’s only in beta version.
Creating a new project
First we need to create a new project. I recommend you using Unity Hub for managing your projects and Unity installs, as it is a quite mature and convenient tool. If you’re not using it, just go here.
When you launch Unity Hub, click the Installs tab and on the left panel select “Official Releases”:
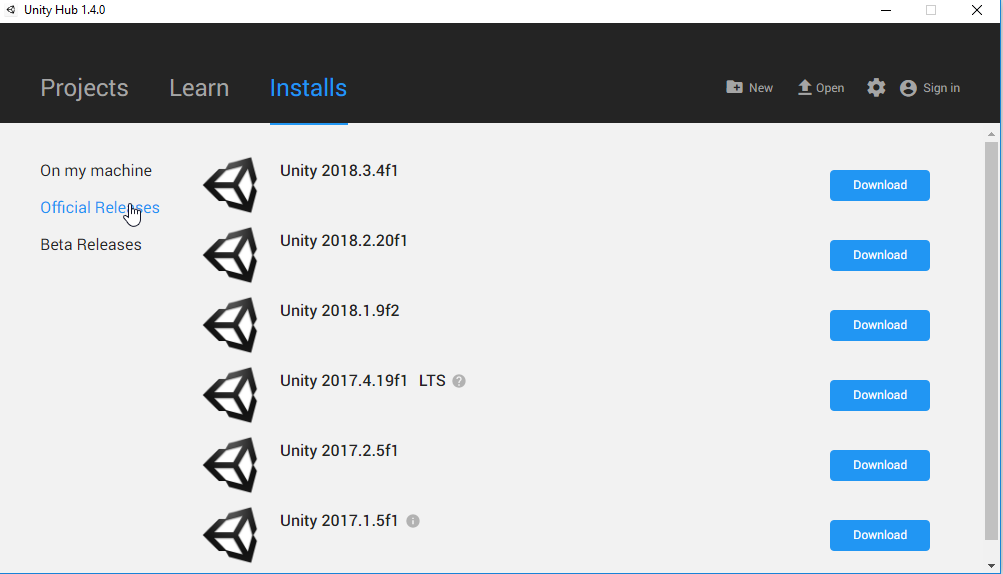
At the time of writing this tutorial, I’m using the newest, 2018.3.4 version. Now just click “Download” and wait a bit. You can keep multiple versions of Unity and assign them to your project, so that it will use a certain version by default. Pretty useful when you have many projects to maintain, and each one of them uses a different Unity version. :)
Now just click “New” and create your project. If you want to start with an existing one, click Open and select it.
Setting up the Entitas Framework
Time to download our framework. :) Go here and download “Entitas.zip”. Unpack it and copy the interiors of Assets folder into your project’s Assets folder.
You can now do some optional steps to organize your files. A common practice is to create two additional directories under the Assets folder: one named _YourProject to store you’re projects files. This will keep it at the top of folder hierarchy and make navigating a lot easier. You can move your Scenes folder there. second one named Libraries, where you can put for example our newly downloaded framework.
When the plugin finished loading, click Assets -> Open C# Project in the upper menu, so that Unity can create a C# project file.
Now return to Unity, click Tools -> Jenny -> Preferences and click Auto Import.
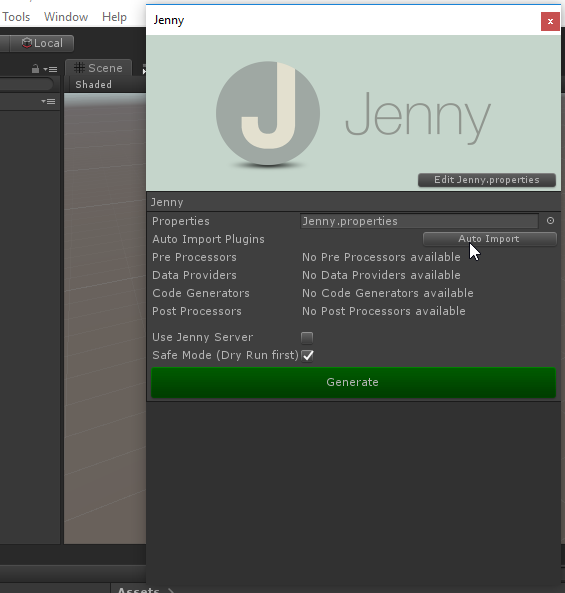
The window will change and we’ll see some extra options:
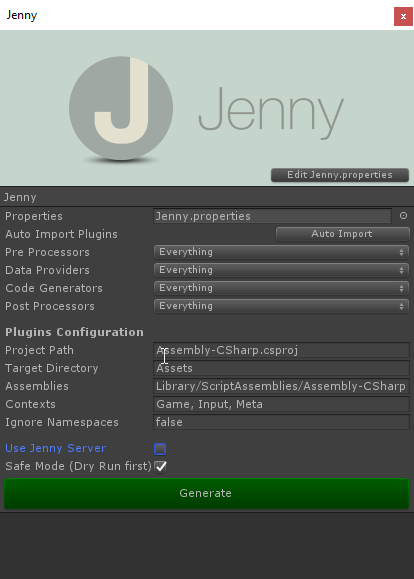
The thing which is important for us now is the Contexts field. We will use it to organize our entities and components, so take a moment to think about it. I typically use three basic: Game - to keep together everything connected with the core game - player, running effects, board, current health, current lives and so on, Input - to store information about user input, Meta - to keep everything else - how much gold does the user have, her skins, equipment, unlocked level, maps etc.
Now it is time to push that glorious, big, green button. :)
Quick test
When Entitas finishes generating the code, we’re good to go. Let’s just quickly test if everything is running ok.
We will create a simple popup to test our setup. Firstly, lets create a main system for the game called GameController. It will take care of initializing and firing up all of the systems which our game will be composed of. The most basic GameController can look like this: using Entitas; using UnityEngine;
public class GameController : MonoBehaviour
{
    private Systems _systems;

    private void Start()
    {
        _systems = new MainSystem(Contexts.sharedInstance);
        _systems.Initialize();
    }

    private void Update()
    {
        _systems.Execute();
        _systems.Cleanup();
    }

    private void OnDestroy()
    {
        _systems.TearDown();
    }
}
In the MainSystem we will plug in all of our general features, like for instance the InputSystem, PlayerSystem, etc. For now, we will just create a dummy system, which will make some noise:
public class MainSystem : Feature
{
    public MainSystem(Contexts contexts)
    {
        Add( new TestSystem(contexts.game) );
    }
}

using Entitas;
using UnityEngine;

public class TestSystem : IExecuteSystem
{
    public TestSystem( IContext<GameEntity> context )
    {
    }

    public void Execute()
    {
        Debug.Log( "I'm executing!" );
    }
}
Since we didn’t introduce new components, we don’t have to regenerate the project. Simply add the GameController to the game object on the scene and run the game.
If everything went well, we will see messages spamming in the console window:

Voila! Now you can start coding the game. :)
And as always - like my fan page or follow me on Twitter to get notified when future posts appear. (。◕‿◕。) If’re curious about my private side - don’t hesitate to take a look at my Instagram profile (that’s where I am active the most).
comments powered by Disqus